Let’s create a game using HTML and JavaScript, without relying on game engines or libraries.
This guild is for people who:
Want to make a game but don’t know where to start.
Want to create a simple game without using complex engine like Unity or Unreal Engine.
It’s aimed at those who with some programming knowledge.
What we build?
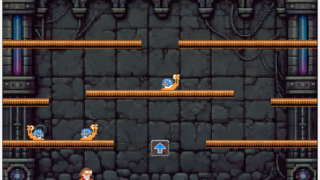
This is Part 2 of “Making a Mario Bros.-style Jump Action Game.” Here’s what we’ll be doing this time:
Enemy Character: If the floor they’re standing on gets hit from below, they flip over.
Power Block: When hit, it shakes the entire stage, flipping over all enemies standing on the floor.
I think this is such a simple yet brilliant idea—it’s the kind of concept that makes you wonder, “How did they even think of this?”
What’s amazing is that you don’t attack enemies directly; you attack them indirectly. Plus, after they flip over, you can flip them again to turn them back. The balance between the idea and gameplay is just genius.
Demo in Action
Try it first!
You also can play with gamepad.
You can play the game in fullscreen mode by double-clicking on the game display area.

Articles to Read First
Source Code
Here’s how the file structure looks:
.
├── Block.js
├── Chara.js
├── GObject.js
├── PBlock.js
├── Pipe.js
├── Snail.js
├── SpriteSheet.js
├── UserInput.js
├── World.js
├── assets
│   ├── chara_spritesheet.png
│   ├── pow_spritesheet.png
│   ├── snail_spritesheet.png
│   ├── stages.json
│   ├── style.css
│   └── tilesheet.png
├── index.html
└── index.js
We’re starting to get quite a few files now. Pipe and Block, which are part of the game scene, were already around last time, and I separated out their class definitions into individual files.
The only new game objects I’ve added this time are Snail (Snail.js) and PowBlock (PBlock.js).
Class Structure for Game Components
With this implementation, the class structure for in-game objects looks like this: everything is treated as a child of GObject.
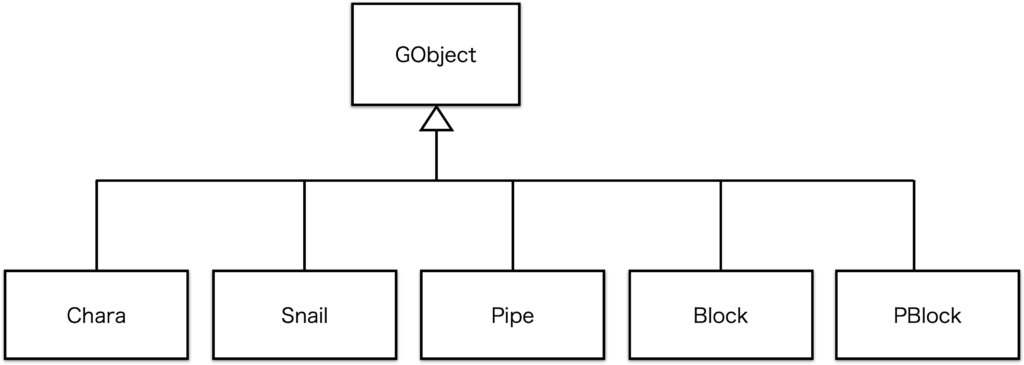
With this setup, the class structure for in-game objects looks like this: everything is treated as a child of GObject.
Chara and Snail are animated and move around, but Pipe and PBlock mostly stay still, while Block is completely fixed. So, they don’t use the animation management features from the parent class GObject. Still, it’s not a bad idea to keep things flexible, in case we want to add more interactions to these static objects later on.
That said, when you’re coding everything yourself, a big advantage is that you can implement only the logic you actually need. If you were making something like a Sokoban or Tetris, this setup would be overkill and just make things harder.
On the other hand, if you use a game engine (like Unity or Unreal Engine), you don’t get as much freedom. You have to follow the framework’s rules, and for small 2D games, this can mean high learning costs and a lot of unnecessary extra work.
Introducing the Snail
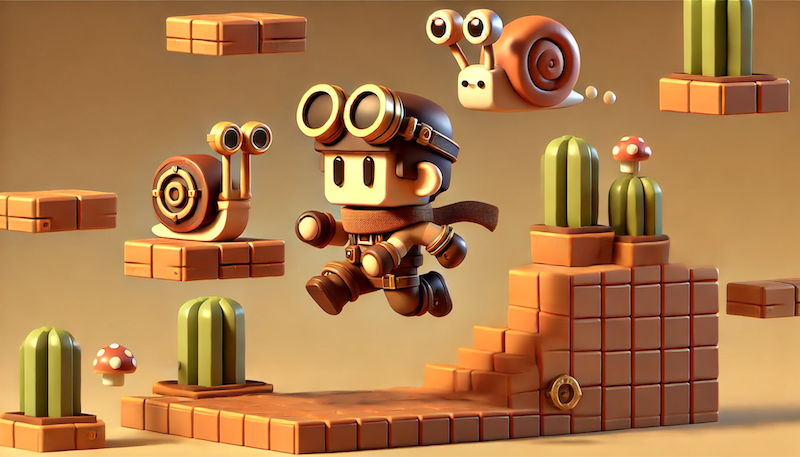
Now, our enemy character finally makes an appearance! Instead of Mario’s classic turtle, we’re using a snail in this demo.
State Definition
To make the Snail move, I’ve set up states as shown in the table below.
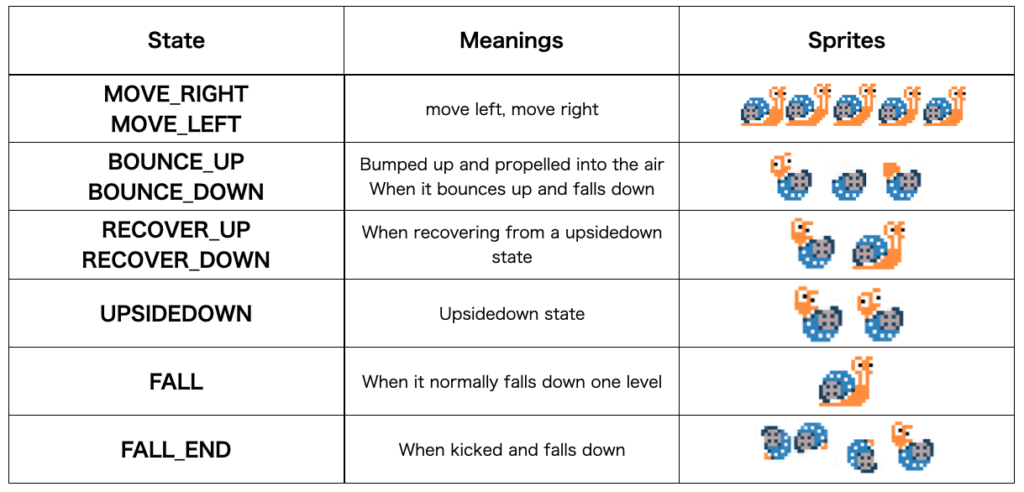
The animation patterns are kept to a minimum, but they’re expressive enough for gameplay.
By the way, if you take a close look at the arcade version of Mario Bros. on YouTube, you’ll see it actually has quite a few detailed animation patterns, showing how much effort went into the details. The NES version, on the other hand, is a bit simplified.
Floor Bump Mechanic
When the player character jumps and hits a block above, the block bounces up. I changed the implementation for this from the last post. It was fine before, but I thought of a cleaner approach, so I reworked it. It’s common for code to evolve as you work, and I hope you enjoy seeing how it changes!
In the jump state, the player checks if they’ve hit something, as you can see in the implementation below.
    action_jump_up() {
        if (this.vy < 0) {
            const ht = this.world.pushUpObj(this.head_area());
    ・・・
The World class checks if any of the map objects have been hit:
    pushUpObj(src) {
        let ht = false;
        for (let o of this.map) {
            if (o.push_up(src))
                ht = true;
        }
        return ht;
    }
Whether or not an object on the map gets bumped up is handled within each object’s push_up() method. For example, here’s what happens in the case of Pipe:
    push_up(src) {
        if (src.y < this.y)
            return false;

        if (this.hit(src, this)) {
            let p = src.x+src.w/2;
            if (p >= this.x && p <= this.x+this.w) {
                this.vy = src.vy/2;
            } else {
                this.vy = src.vy/4;
            }
            this.change_state(State.PUSH_UP);
            return true;
        }
        return false;
    }
Ignoring the finer details, the main process here is that if a hit is detected with if (this.hit(src, this)), the object’s state changes to State.PUSH_UP.
Collision Detection Implementation
The collision detection logic is in GObject.js, where it checks if the areas of two rectangles overlap to determine if a collision has occurred.
export function collision(obj1, obj2) {
    let flg =  obj1.x >= obj2.x + obj2.w
        || obj2.x >= obj1.x + obj1.w
        || obj1.y >= obj2.y + obj2.h
        || obj2.y >= obj1.y + obj1.h;
    return !flg;
}
・・・
class GObject {
・・・
    hit(src) {
        return collision(src, this.bounds());
    }
・・・
Handling the Bump Effect
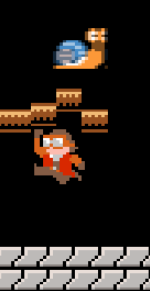
When part of the floor bumps up, if a Snail is on it, the Snail also gets bumped and flips over. Whether the Snail is hit is determined by the bumped floor—in this case, the Pipe object.
As explained before, the Pipe enters the PUSH_UP state when it’s bumped up. In this state, the action_push_up() method runs, as shown below:
    action_push_up() {
     ・・・
        this.world.pushUpEnemy(this);
    }
pushUpEnemy(src) {
for (let o of this.enemy_list) {
o.push_up(src);
}
}Using this method from the World class, we handle the bump effect on all enemy characters in the game. While this demo only has one Snail, an actual game could have multiple enemies moving around at the same time, each having their push_up() method called.
Now, let’s look at what push_up() does in Snail:
    push_up(src) {
        if (this.state == State.BOUNCE_UP || this.state == State.RECOVER_UP)
            return false;

     // The super.hit function checks for a collision
        if (super.hit(src, this)) {
            // Decides the next state based on whether it was hit while flipped over
            if (this.state == State.UPSIDEDOWN) {
                this.change_state(State.RECOVER_UP);
            } else {
                this.change_state(State.BOUNCE_UP);
            }

       // Determines the bounce direction (vx) based on position relative to the block
            const p1 = src.x+src.w/2;
            const p2 = this.x+this.w/2;
            if (p1 < p2-2) {
                this.vx = 0.5;
            } else if (p1 > p2+2) {
                this.vx = -0.5;
            } else {
                this.vx = 0;
            }
            this.vy = -2;
            return true;
        }
        return false;
    }
t’s a bit of code, but if you read through it, it’s actually pretty straightforward.
So, what about non-moving Block objects? What does their push_up() do? The answer: “Nothing.”
    push_up(src) {
    }
The Earth-Shaking Power Block
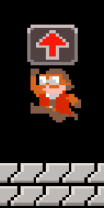
The Power Block is a super-powerful game gimmick. It works as a last-minute game-changer and adds some flashy effects. But actually, it’s pretty easy to implement.
Flipping All Enemies
When the player character jumps and hits the Power Block, it calls the pushUpAllEnemy() method in World. Here’s how it works:
    pushUpAllEnemy() {
        shake_camera();
        for (let o of this.enemy_list) {
            if (o.is_on_obj(1))
                o.push_up(o);
        }
    }
shake_camera() makes the whole screen shake. Then, for each enemy, it checks if they’re on the ground and just calls push_up().
How the Screen Shakes
So, how does the screen shaking actually work? It’s handled by the shake_camera() function, which we called in pushUpAllEnemy().
To make this work, there’s some setup involved. All the games we’ve built so far use two canvas layers. The actual game screen size is pretty small and scaled up so it’s playable. We use the standard drawImage() function for scaling, which lets us set the area of the original canvas to display.
We make the display area slightly smaller than the actual game screen, or in other words, we set up a slightly larger display area than the real game area, as shown in the diagram below.
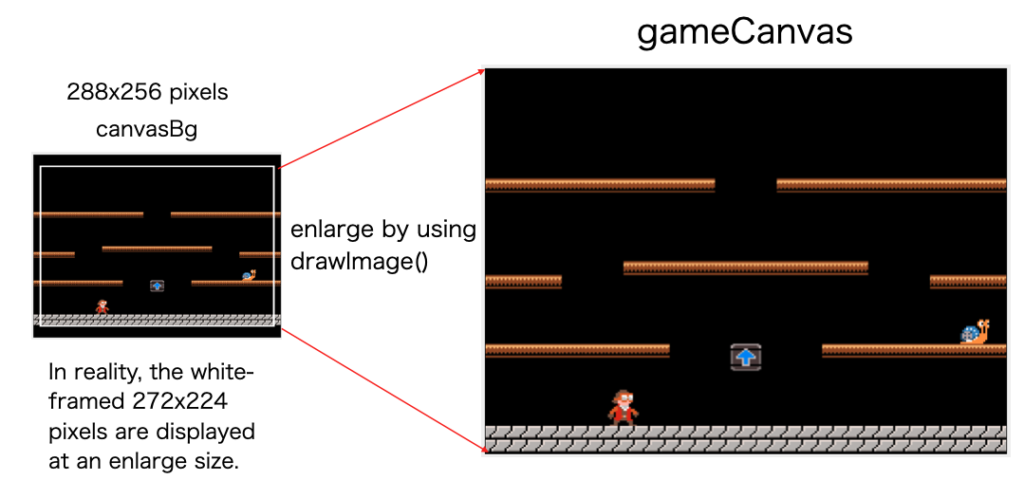
When it’s time to shake the screen, all we need to do is adjust the cut-out area’s position, as shown in the diagram.
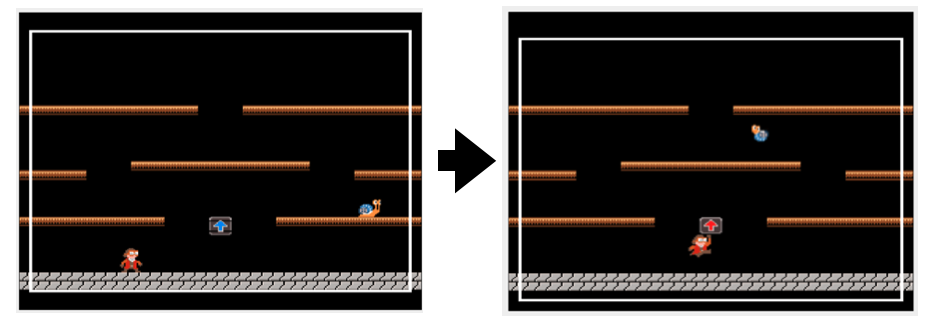
To make the screen shake smoothly up and down, the position shifts a little bit each frame. This is essentially another kind of animation, implemented in the following section of index.js.
・・・
const camera_pos = {
    x: 8,
    y: 8*2,
};

// camera shake functions
//
let camera_up_count = 0;
let camera_down_count = 0;
const SHAKE_RANGE = 8;

export function shake_camera() {
    camera_up_count = SHAKE_RANGE;
}
function check_camera_shake() {
    if (camera_up_count > 0) {
        camera_up_count--;
        let dy = (SHAKE_RANGE-camera_up_count);
        camera_pos.y = 8*2 + dy;
        if (camera_up_count == 0)
            camera_down_count = SHAKE_RANGE;

    }
    if (camera_down_count > 0) {
        camera_down_count--;
        let dy = camera_down_count;
        camera_pos.y = 8*2 + dy;
    }
}
・・・
Each frame, the y-coordinate of the cut-out area shifts by +1 up to 8 pixels, then shifts back by -1 each frame to return to the original position. That’s all it’s doing.
Wrapping Up
With this demo, we’ve recreated the core game mechanics from Mario. All that’s left is adding more enemy types, coins, a scoring system, and stage completion.
Even at this unfinished stage, I think you can get a good sense of what makes the game fun.
Next time, I’ll add the remaining elements to complete this Mario-style game!
