Let’s create a game using HTML and JavaScript, without relying on game engines or libraries.
This guild is for people who:
Want to make a game but don’t know where to start.
Want to create a simple game without using complex engine like Unity or Unreal Engine.
It’s aimed at those who with some programming knowledge.
What we build?
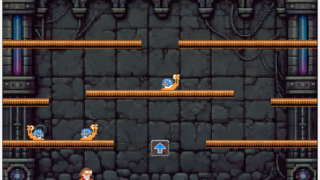
Through a series of posts, we’ll be creating a game inspired by the classic “Mario Brothers” style—a single-screen action game.
Personally, I liked this more than “Super Mario” because it’s simple yet deep, and the real fun of ‘Mario Bros.’ lies on its two-player mode, which is something you can’t quite experience in “Super Mario.” That said, in this series, we’ll be making a game that you can play solo.
Demo in Action
In this article, we’ll bring to life the iconic Mario world gimmick, the “floor push-up” action, with a touch of cyberpunk vibe. Try playing the demo first!
j … Move Left, l … Move Right, c … Jump
You also can play with gamepad.
You can play the game in fullscreen mode by double-clicking on the game display area.
Articles to Check Out Before
Check out following article to understand how to implement character jump action.
Source Code
Here’s how the file structure looks:
.
├── Chara.js
├── README.md
├── SpriteSheet.js
├── UserInput.js
├── World.js
├── assets
│   ├── background_picture.png
│   ├── chara_spritesheet.png
│   ├── stages.json
│   ├── style.css
│   └── tilesheet.png
├── index.html
└── index.js
Data Structure of Map Elements
In the games we’ve made so far, the map elements were assumed to be static, so they didn’t have coordinate information. This time, since the floor is a movable element, each object with coordinate information can keep thing simple.
There are two types of map elements except player character in this demo: movable floors and static floors.
const Elem = {
 ・・・
    PIPE: 2,      // Element of movable floor as pipes in the demo world
    BLOCK: 3,  // Element of static floor
}
We manage the game map in “World.js.” During initialization, the constructor uses the map data passed in to generate a list of objects in createMap(), assigning coordinate to each object on the screen.
Here’s the implementation:
export class World {
    constructor(w,h, data) {
        this.w = w;
        this.h = h;
        this.map = this.createMap(data);
        ・・・
    }

    createMap(m) {
        let dat = [];
        for (let y = 0; y < this.h; y++) {
            for (let x = 0; x < this.w; x++) {
                let id = m[x + y*this.w];
                switch(id) {
                case Elem.PIPE: dat.push(new EPipe(x*MAP_ELEM_SIZE, y*MAP_ELEM_SIZE)); break;
                case Elem.BLOCK: dat.push(new EBlock(x*MAP_ELEM_SIZE, y*MAP_ELEM_SIZE)); break;
                }
            }
        }
        return dat;
    }
In createMap(), we use the x and y coordinates to create a list of objects corresponding to each grid cell up to the map’ width (w) and height (h).
When creating objects, their coordinates are passed into the constructor. Nothing is generated in empty spaces. This differs from previous games we’ve made.
Pros and Cons of the Two Data Structure
Here shows two type of methods to manage map elements:
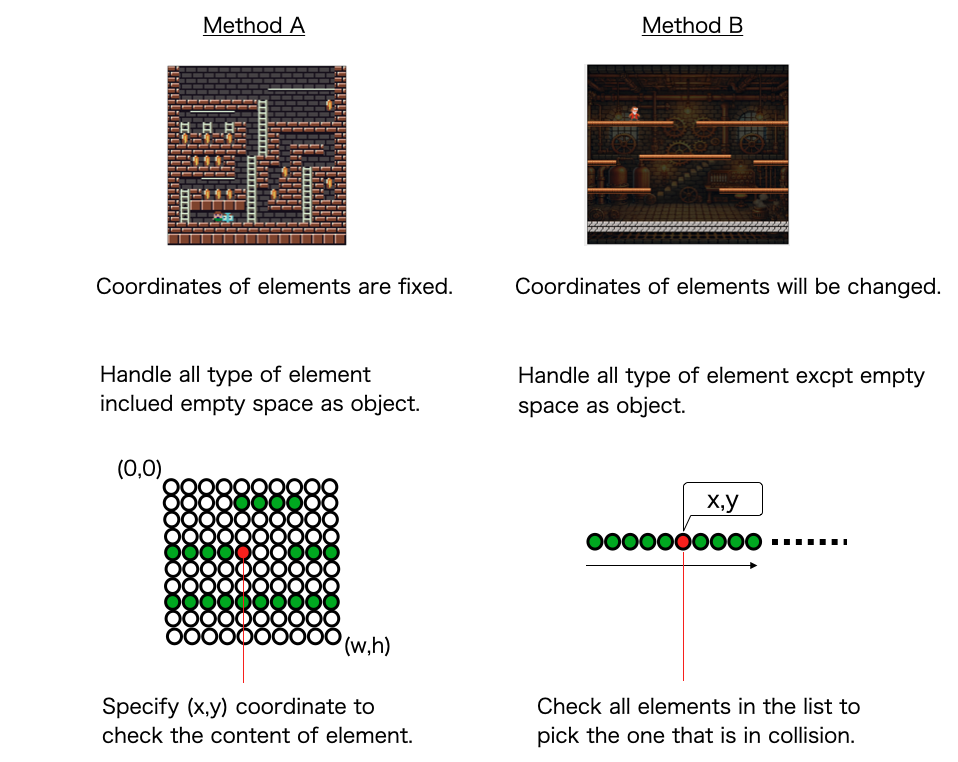
This time, we’re using method B for managing coordinates. It’s more flexible and works for different types of games like block breakers, shooters, action games, and more.
That said, it’s not like method A doesn’t have its advantages. It’s less demanding in terms of calculations for collision detection (though it does use more memory).
With method A, you can just create an index based on the player’s coordinates and grab objects from an array. But with method B, you have to go through and compare all the objects’ coordinates one by one.
However, using method A to implement the floor push-up we want would be way more complex. It’s not impossible, but you’d need a tricky setup like layering a moving block on top of the hit block and hiding the original block.
Method B is more versatile and works fine for most types of games, but in a game like Lode Runner, where you need to check if the player’s standing on a ladder, having to go through every element would be inefficient.
Still, whether it’s memory usage or calculation load, the scale of these retro games is tiny compared to what modern computers can handle. We’re not using the weak PCs of the 8-bit era, so in the end, it’s a matter of personal preference. As a programmer, you’ll want to weigh things like speed, memory usage, and code readability to decide which design and implementation to go with.
Choosing simplicity and going with an implementation that ignores memory and processing speed concerns is totally fine too. It’s one of the fun parts of making retro games these days. Compared to using something like Unity or Unreal Engine, the ‘waste’ here is laughably insignificant anyway.
Collision Detection and Pushing Up the Floor
We check if the player hits the upper block when jumping. This is handled in the action_jump_up() function when the character’s state is JUMP_UP.
    action_jump_up() {
        if (this.vy < 0) {
            const hl = this.world.hitObj(this.x+2, this.y+9, 0, this.vy/4);
            const hc = this.world.hitObj(this.x+this.w/2, this.y+9, 0, this.vy/2);
            const hr = this.world.hitObj(this.x+this.w-2, this.y+9, 0, this.vy/4);
            if (hl || hc || hr) {
                this.vy = 0;
                this.change_state(State.JUMP_HIT);
                return;
            }
        }
    ・・・・
    }
We determine if there’s a collision with an upper block using the coordinates and width of the character, leveraging the hitObj() method in the World class. Depending on where the 16-pixel-wide character hits, we vary the impact force. (This is just an example of implementation, feel free to tweak it to your liking!)
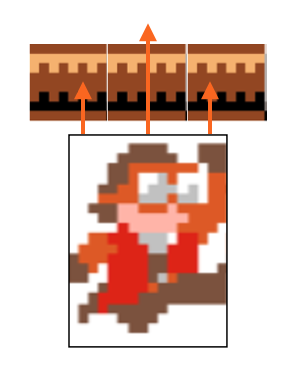
The hitObj() method in the World class calls each object’s hit() method to confirm collisions.
    hitObj(x,y,dx,dy) {
        for (let o of this.map) {
            if (o.hit(x,y, dx, dy)) {
                return true;
            }
        }
        return false;
    }
class EPipe {
・・・
hit(x,y, dx, dy) {
if (!this.can_go_through(x,y)) {
this.x += dx;
this.vy = dy;
this.pushed_up = true;
return true;
}
return false;
}
・・・If a collision occurs, the object takes the given dy as vy, and in the next frame, the y-coordinate is moved accordingly. Each frame’s movement of the object is handled in the update() function.
class EPipe {
・・・
    update() {
        if (this.pushed_up) {
            this.y += this.vy;
            this.vy += GRAVITY;
            if (this.vy >= 0) {
                if (Math.floor(this.y) == this.o_y) {
                    this.y = this.o_y;
                    this.pushed_up = false;
                }
            }
        }
・・・
As you can see from the implementation, when the push_up flag is set to true, an upward force is applied each frame.
In these instances, we add gravity (GRAVITY) to vy each frame, so it simulates bouncing up and then falling down. This part is implemented the same way as the player’s gravity handling.
While you could manage gravity in the EPipe class instead of in the World class alongside the character’s gravity, keeping it in the World class makes the implementation neater—but we’ll leave it as is for now.
Wrapping up
We’ve gone over the implementation of the floor push-up, a classic Mario game gimmick. Watching videos on YouTube will show you that the original Mario used a different method to achieve this.
In this demo, we opted for a simpler approach. Hopefully, reading through this explanation made you realize how surprisingly simple it is to implement.
As we wrap up the game, this gimmick might evolve, and it’s the journey of refining things that makes it fun.
Next time, we’ll introduce enemies that flip over due to the floor push-up action.
