Motivation
This blog has previously covered how to create games using only HTML and JavaScript.
The games were made with the idea that they’d run in a browser, without using tools like Unity or Unreal Engine. The development environment is very simple—you just need a browser and an editor.
Wouldn’t it be great if the games you created could easily run as an app on a smartphone (iPhone, Android)?
Well, there is a way to do that, and I’ll introduce it in this article. Since I use an iPhone, I’ll proceed with the discussion in that environment, but I believe it can be adapted for Android as well.
Using Capacitor
When I looked into how to run HTML/JavaScript programs on an iPhone, I found several options, such as Cordova, React Native, Ionic, and Capacitor. Cordova failed to build on my Mac environment. Ionic worked, but since it requires using a UI framework, it seemed a bit complicated.
In the end, I got it working with Capacitor. Capacitor is a platform that sits at the lower layer of Ionic.
This platform is simple and allows HTML and JavaScript programs that run in a web browser to work on the iPhone as-is. The build time is short, and you can easily run JavaScript games in the iOS environment, so it’s quite nice.
Cacacitor HP: https://capacitorjs.jp
Required Environment
Xcode
To create an iPhone app, you’ll need Xcode. You can install it from the App Store. You can use it for free to run apps on the iPhone simulator on your computer. However, if you want to transfer the app to a real iPhone or publish it on the App Store, you’ll need to pay an annual fee $99.
Node.js
Capacitor is installed using the npm command. Since npm is the package management tool for Node.js, you’ll need to install Node.js first.
Running “Hello World” on iPhone
Let’s try running an index.html that displays “Hello World.”
Create directory for app and install Capacitor
First, create a directory for the app and install Capacitor. Capacitor’s environment is created within the app’s directory.
(1) Create the directory for the app:
$ mkdir hello(2) Install Capacitor:
$ cd hello
$ npm install @capacitor/cli @capacitor/core
・・・
$ npx cap init
[?] What is the name of your app?
    This should be a human-friendly app name, like what you'd see in the App Store.
✔ Name … App
[?] What should be the Package ID for your app?
    Package IDs (aka Bundle ID in iOS and Application ID in Android) are unique identifiers for apps. They must be
    in reverse domain name notation, generally representing a domain name that you or your company owns.
✔ Package ID … com.example.app
[?] What is the web asset directory for your app?
    This directory should contain the final index.html of your app.
✔ Web asset directory … www
✔ Creating capacitor.config.json in /Users/huangyenshan/test/capacitor/hello in 4.53ms
[success] capacitor.config.json created!

Next steps:
https://capacitorjs.com/docs/getting-started#where-to-go-next
(3) Install the target native platform:
$ npm install @capacitor/ios
$ npx cap add ios
Create Hello World html file
Now, create the www folder under hello:
$ mkdir www
$ cd www
$ vi index.html #Edit the file using your favorite editor
Here’s the source for index.html.
<html>
    <center>
        <h1>Hello, World!</h1>
        <h1>Hello, World!</h1>
        <h1>Hello, World!</h1>
        <h1>Hello, World!</h1>
        <h1>Hello, World!</h1>
        <h1>Hello, World!</h1>
        <h1>Hello, World!</h1>
    </center>
</html>
Run it on iPhone emulator
Then, within the hello directory, run:
$ npx cap sync ios
$ npx cap open ios
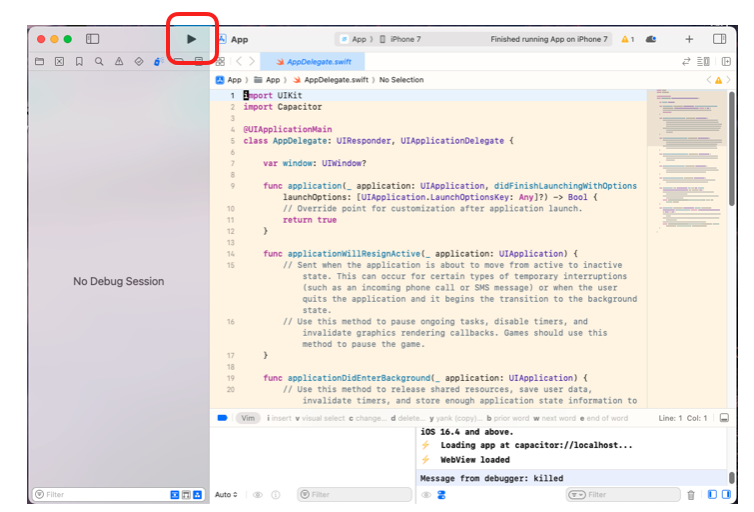
Xcode will start. Press the play button in the red frame shown in the image below to build and run it on the emulator.
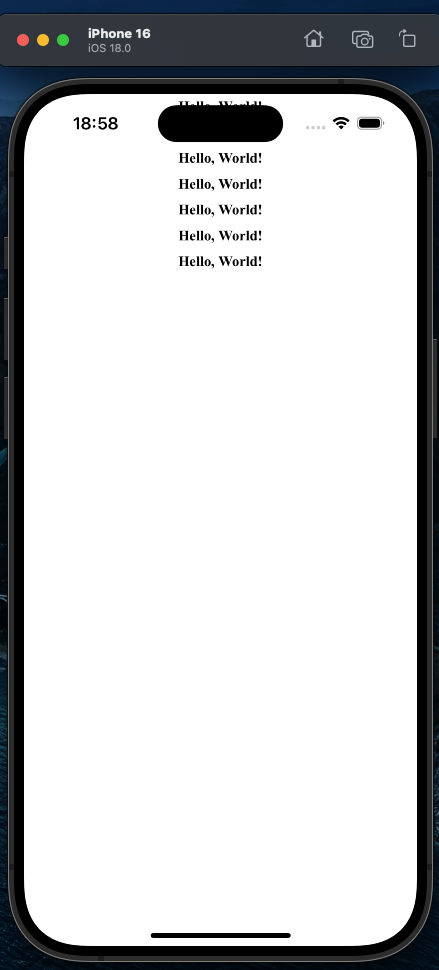
The iPhone emulator starts, and “Hello, World!” is displayed. Since the positioning wasn’t considered at all, part of the text is hidden, but it ran easily. I don’t fully understand the mechanism of Capacitor yet, but it feels like it simply placed the browser on the device.
Running a Game on iPhone
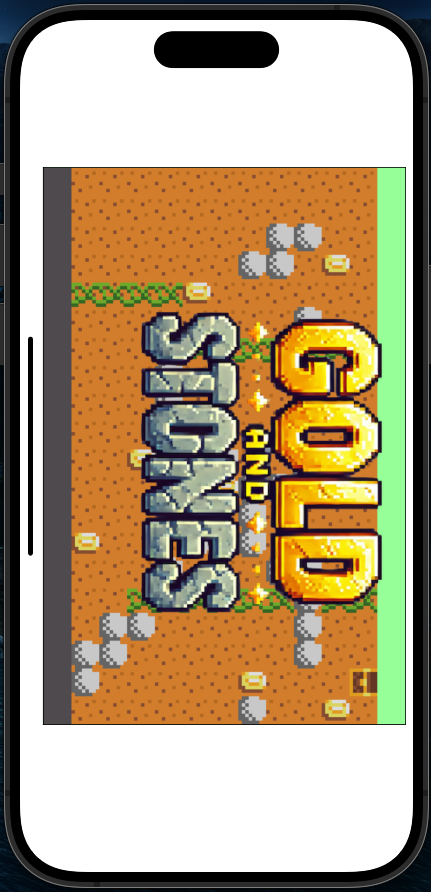
Now, if you run the game you made for the web browser on the iPhone using Capacitor, it will look something like this:
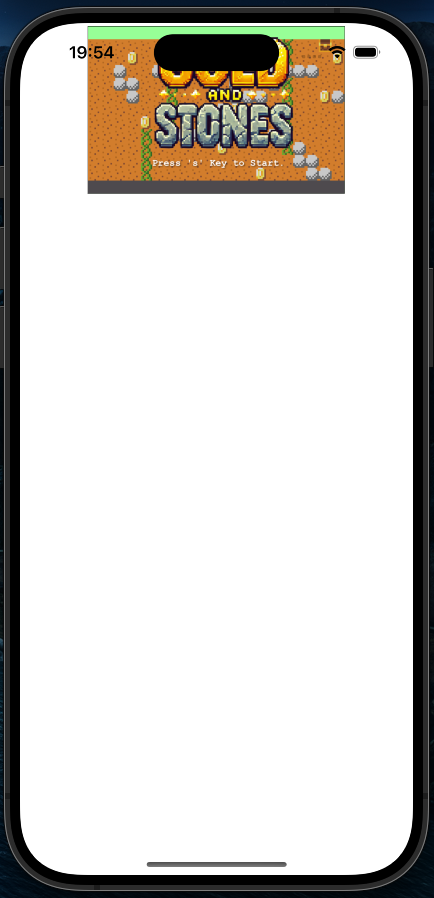
It ran perfectly on the first try, but some adjustments for smartphones are necessary.
The game I want to run this time is designed for landscape-only, so I want to fix the orientation to landscape. To do this, you need to edit the iOS app’s settings file.
In the ios/App/App/Info.plist file generated in your working folder, delete the following lines:
・・・
	<array>
		<string>UIInterfaceOrientationPortrait</string>  Delete this line
		<string>UIInterfaceOrientationLandscapeLeft</string>
		<string>UIInterfaceOrientationLandscapeRight</string>
	</array>
	<key>UISupportedInterfaceOrientations~ipad</key>
	<array>
		<string>UIInterfaceOrientationPortrait</string>  Delete this line
		<string>UIInterfaceOrientationPortraitUpsideDown</string>  Delete this line
		<string>UIInterfaceOrientationLandscapeLeft</string>
		<string>UIInterfaceOrientationLandscapeRight</string>
	</array>
・・・
Now, it’s fixed to landscape mode as shown below.
Next: Support for Touch Events
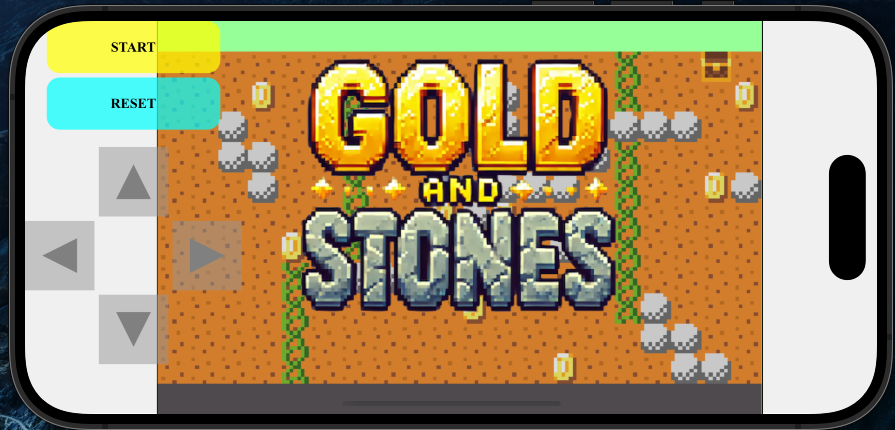
So far, the games we’ve created on this blog are retro games, so the means of control is either a keyboard or a gamepad. If you use a Bluetooth-compatible device, you might be able to play on a smartphone, but we want to support the touchscreen as well.
Therefore, we prepared a GUI for the gamepad, as shown below, to make it playable on a touchscreen.
Explaining the source code to make this happen will be lengthy, so I’ll leave it for the next article.


