We will make a game using only HTML and JavaScript, without using any game engines or libraries.
This guide is for people who:
Want to make a game but don’t know where to start.
Want to make a simple game but feel that learning Unity or Unreal Engine is too much.
It’s targeted at those who already have some programming knowledge.
What We’ll Make in This Article
The pixel art character moves while switching animations based on its state. Try pressing the left and right arrow keys.
Articles to Read First
I recommend reading the article below first, which explains how to animate pixel art characters.
Source Code
Place index.html and index.js in the same folder. Additionally, prepare a spritesheet.png with pixel art patterns and place it in the same folder. You can execute it by loading index.html in a browser.
This demo uses spritesheet.png。
<html>
    <center>
        <canvas id="canvasBg" width="80" height="32" style="border:1px solid #000000; background-color: #000; display:none;"></canvas>
        <canvas id="gameCanvas" width="640" height="256" style="border:1px solid #000000; background-color: #000;"></canvas>
    <script type="text/javascript" src="index.js"></script>
</html>
// background canvas
const canvas_bg = document.getElementById('canvasBg');
const context_bg = canvas_bg.getContext('2d');
// display canvas
const canvas = document.getElementById('gameCanvas');
const context = canvas.getContext('2d');
context.imageSmoothingEnabled = false;
const State = {
STANDING: 0,
MOVE_LEFT: 1,
MOVE_RIGHT: 2,
}
class Chara {
constructor(x,y, anime_table, wait_time=0) {
this.x = x;
this.y = y;
this.anime_count = 0;
this.anime_index = 0;
this.move_count = 0;
this.state = State.STANDING;
this.flip = false;
this.anime_table = anime_table;
this.wait_time = wait_time;
this.wait_count = this.wait_time;
this.next_action_input = State.STANDING;
}
update() {
if (this.wait_count > 0) {
this.wait_count--;
return;
}
this.next_action();
switch(this.state) {
case State.STANDING:
this.next_action();
// do nothing
break;
case State.MOVE_RIGHT:
this.count_move(1, 0);
break;
case State.MOVE_LEFT:
this.count_move(-1, 0);
break;
}
this.anime_update();
this.wait_count = this.wait_time;
}
next_action() {
}
anime_update() {
let frames = this.anime_table[this.state].frames;
let frame_interval = this.anime_table[this.state].frame_interval;
if (this.anime_count >= frame_interval) {
this.anime_index = (this.anime_index+1) % frames.length;
this.anime_count = 0;
}
this.sprite = frames[this.anime_index];
this.anime_count++;
}
draw() {
drawSprite(this.sprite, this.x, this.y, this.flip);
}
change_state(state) {
if (state == this.state) {
return;
}
this.state = state;
this.anime_index = 0;
this.anime_count = 0;
this.move_count = this.anime_table[this.state].move_count;
}
count_move(dx, dy) {
this.move_count--;
if (this.move_count < 0) {
this.stop_move();
return;
}
this.x += dx;
this.y += dy;
}
stop_move() {
this.change_state(State.STANDING);
}
move_right() {
this.change_state(State.MOVE_RIGHT);
this.flip = false;
}
move_left() {
this.change_state(State.MOVE_LEFT);
this.flip = true;
}
}
class Monster extends Chara {
setTarget(target) {
this.target = target;
}
next_action() {
if (this.x < this.target.x) {
this.move_right();
} else if (this.x > this.target.x) {
this.move_left();
} else {
this.stop_move();
}
}
}
// Input event handler
document.addEventListener('keydown', keyDownHandler, false);
function keyDownHandler(event) {
if (event.key === 'Left' || event.key === 'ArrowLeft') {
player.move_left();
}
if (event.key === 'Right' || event.key === 'ArrowRight') {
player.move_right();
}
}
function createBoy(x, y) {
return new Chara(x,y,
[
{state_name: 'STANDING', move_count: 0, frames: [0,1], frame_interval: 60},
{state_name: 'MOVE_LEFT', move_count: 9, frames: [2,3,4], frame_interval: 3},
{state_name: 'MOVE_RIGHT', move_count: 9, frames: [2,3,4], frame_interval: 3},
]);
}
function createMonster(x, y) {
return new Monster(x,y,
[
{state_name: 'STANDING', move_count: 8, frames: [8,10], frame_interval: 50},
{state_name: 'MOVE_LEFT', move_count: 8, frames: [8,9,11], frame_interval: 2},
{state_name: 'MOVE_RIGHT', move_count: 8, frames: [8,9,11], frame_interval: 2},
], 4);
}
function drawSprite(sprite_no, x, y, flip) {
let sx = (sprite_no % 8) *8;
let sy = Math.floor(sprite_no / 8)*8;
if (flip) {
context_bg.save();
context_bg.scale(-1,1);
context_bg.drawImage(spriteSheet, sx, sy, 8, 8, -x-8, y, 8, 8);
context_bg.restore();
} else {
context_bg.drawImage(spriteSheet, sx, sy, 8, 8, x, y, 8, 8);
}
}
function update() {
// draw original size of sprite on background buffer
context_bg.clearRect(0, 0, canvas_bg.width, canvas_bg.height);
for (o of chara_list) {
o.update();
o.draw();
}
// enlaging the display
context.clearRect(0, 0, canvas.width, canvas.height);
context.drawImage(canvas_bg, 0, 0, canvas_bg.width, canvas_bg.height, 0, 0, canvas.width, canvas.height);
}
// load the sprite sheet
const spriteSheet = new Image();
spriteSheet.src = "./spritesheet.png";
let player = createBoy(5,10);
let monster = createMonster(40,20);
monster.setTarget(player);
let chara_list = [];
chara_list.push(player);
chara_list.push(monster);
setInterval(update, 10);Character State Management
Characters that move around in a game have various states. For example:
- Standing still
- Running
- Jumping
We want to animate each state using appropriate images. To do this, we need to first define and manage the character’s states.
In this demo, the Chara class has a variable called state.
・・・
const State = {
    STANDING: 0,
    MOVE_LEFT: 1,
    MOVE_RIGHT: 2,
}
・・・
class Chara {
    constructor(x,y, anime_table, wait_time=0) {
       ・・・
        this.state = State.STANDING;
       ・・・
    }
・・・
}
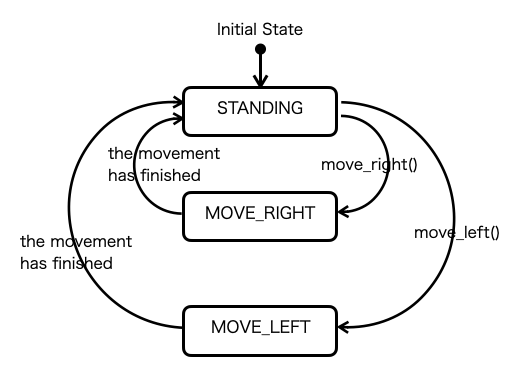
We define only three states:
STANDING: Standing stillMOVE_RIGHT: Moving to the rightMOVE_LEFT: Moving to the left
Animation Information for Each State
After defining the states, we set up animations for each state.
In this demo’s implementation, when creating a character instance, we pass the definitions of the animation states for each state.
function createBoy(x, y) {
    return new Chara(x,y,
        [
            {state_name: 'STANDING', move_count: 0, frames: [0,1], frame_interval: 60},
            {state_name: 'MOVE_LEFT', move_count: 9, frames: [2,3,4], frame_interval: 3},
            {state_name: 'MOVE_RIGHT', move_count: 9, frames: [2,3,4], frame_interval: 3},
        ]);
}
We pass an array of objects containing the following properties, which is managed within the Chara class as anime_table:
state_name: State name (used as auxiliary information when reading the source code or for debugging)move_count: Number of frames for the state actionframes: List of sprite numbers used for that stateframe_interval: Animation update interval (number of frames to wait before updating)
We define the above for each state and put them in an array, but the order must match the definition of the State object.
const State = {
    STANDING: 0,
    MOVE_LEFT: 1,
    MOVE_RIGHT: 2,
}
The Contents of the Animation Information
For example, the animation information for the standing state (STANDING) is as follows:
{state_name: 'STANDING', move_count: 0, frames: [0,1], frame_interval: 60},The numbers 0 and 1 in the frames array are sprite numbers. Here are the images from the spritesheet for 0 and 1.

frame_interval is set to 60, meaning the image changes every 60 frames. Every 60 frames, the index pointing to the frames array advances sequentially, switching the sprite to be drawn.
Since one frame updates every 10 milliseconds, the image changes every 600 milliseconds.
State Switching and Animation
Let’s explain state switching and animation in more detail.
Take the example of a character moving to the right, State.MOVE_RIGHT. Here is the animation information for that:
{state_name: 'MOVE_RIGHT', move_count: 9, frames: [2,3,4], frame_interval: 3},This animation moves as shown below.

When the right key is pressed, the player character’s state switches to State.MOVE_RIGHT.
After switching, it moves using the move_count set to 9 frames. During this time, the animation switches sprites using frames: [2,3,4]. The switch is done at intervals of 3 frames according to the frame_interval setting.
After the 9 frames, it automatically transitions to State.STANDING.
The control for switching sprites is implemented in the following function.
    anime_update() {
        let frames = this.anime_table[this.state].frames;
        let frame_interval = this.anime_table[this.state].frame_interval;

        if (this.anime_count >= frame_interval) {
            this.anime_index = (this.anime_index+1) % frames.length;
            this.anime_count = 0;
        }
        this.sprite = frames[this.anime_index];
        this.anime_count++;
    }
Character Movement
In the State.MOVE_RIGHT state, the character moves to the right while animating. This is achieved with the following code:
・・・
    update() {
        ・・・
        switch(this.state) {
       ・・・
       case State.MOVE_RIGHT:
            this.count_move(1, 0);
            break;
       ・・・
        }
       ・・・
    }
・・・
    count_move(dx, dy) {
        this.move_count--;
        if (this.move_count < 0) {
            this.stop_move();
            return;
        }
        this.x += dx;
        this.y += dy;
    }
・・・
update() is called every 10 milliseconds (the same as one frame of animation).
Within the count_move() function, the character’s coordinates are moved. This is repeated for this.move_count times.
In this implementation, dx = 1 and dy = 0, so it moves 1 dot to the right each time. It moves 9 dots in one MOVE_RIGHT. this.move_count uses the move_count setting information from the animation table.
This function:
this.move_count = this.anime_table[this.state].move_count;is processed when the state changes and updates this.move_count.
    change_state(state) {
        if (state == this.state) {
            return;
        }
        this.state = state;
        this.anime_index = 0;
        this.anime_count = 0;
        this.move_count = this.anime_table[this.state].move_count;
    }
Summary
So far, we’ve explained how to link character movements with animation as realized in the demo.
The key points are:
- Giving the character a state
- Providing animation information for each state
The implementation method shown here is just one example. For now, feel free to use it as a reference.
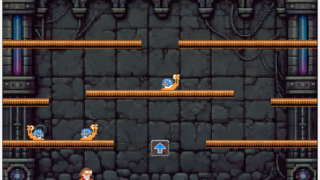
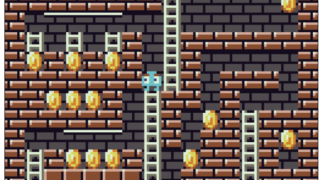
With this system, you can handle the creation of relatively complex games. You can even create action games like Mario Brothers using these extensions.
Even simple games like Sokoban can achieve richer expressions by introducing the animation system shown here.
If you like it, feel free to tweak and play around with it.




コメント