We will make a game using only HTML and JavaScript, without using any game engines or libraries.
This guide is for people who:
Want to make a game but don’t know where to start.
Want to make a simple game but feel that learning Unity or Unreal Engine is too much.
It’s targeted at those who already have some programming knowledge.
What We’ll Make in This Article
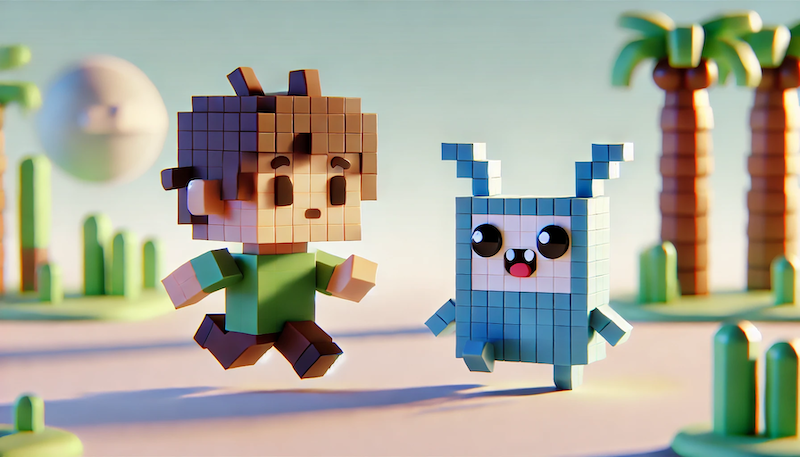
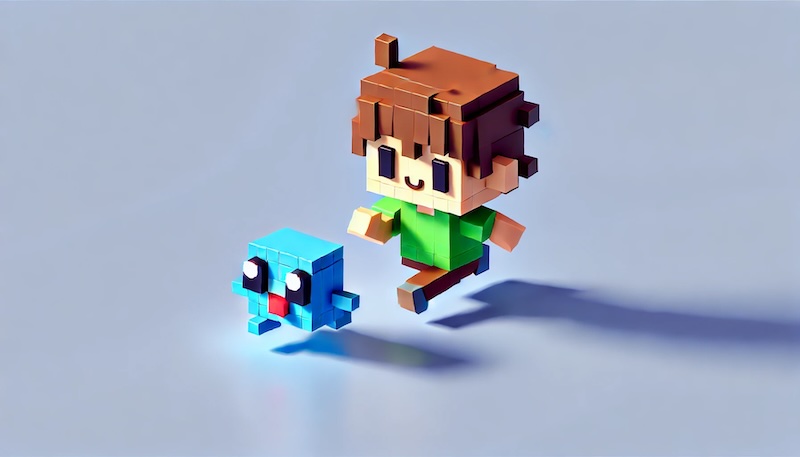
We’ll create a demo of pixel art characters performing animations.
Even with rough pixel art and minimal motion, animation adds a lot of character in the game. As you’ll see in the source code, the implementation isn’t that difficult.
The animation in this demo has limited motion, but that’s simply because drawing pixel art is a bit tedious. If you put in the effort to draw more frames, you can create much more detailed animations without changing the underlying system.。
Source Code
Place index.html and index.js in the same folder. Additionally, you’ll need a spritesheet.png with pixel art patterns, which should also be in the same folder. You can execute it by loading index.html in a browser.
This demo use spritesheet.png。
<html>
    <center>
        <canvas id="canvasBg" width="80" height="32" style="border:1px solid #000000; background-color: #000; display:none;"></canvas>
        <canvas id="gameCanvas" width="640" height="256" style="border:1px solid #000000; background-color: #000;"></canvas>
    <script type="text/javascript" src="index.js"></script>
</html>
// background canvas
const canvas_bg = document.getElementById('canvasBg');
const context_bg = canvas_bg.getContext('2d');
// display canvas
const canvas = document.getElementById('gameCanvas');
const context = canvas.getContext('2d');
context.imageSmoothingEnabled = false;
// load the sprite sheet
const spriteSheet = new Image();
spriteSheet.src = "./spritesheet.png";
class Chara {
constructor(x,y, anime_table) {
this.x = x;
this.y = y;
this.frame_interval = 0;
this.frame_index = 0;
this.flip = false;
this.anime_table = anime_table;
}
update() {
this.anime_update();
}
anime_update() {
let frames = this.anime_table.frames;
let frame_interval = this.anime_table.frame_interval;
if (this.frame_interval >= frame_interval) {
this.frame_index = (this.frame_index+1) % frames.length;
this.frame_interval = 0;
}
this.sprite = frames[this.frame_index];
this.frame_interval++;
}
changeDirection() {
this.flip = !this.flip;
}
draw() {
drawSprite(this.sprite, this.x, this.y, this.flip);
}
}
// generate characters
let chara1 = new Chara(20, 10, {frames: [0,1,2,3,4], frame_interval: 60});
chara1.changeDirection();
let chara2 = new Chara(50, 20, {frames: [8,9,10,11], frame_interval: 50});
function drawSprite(sprite_no, x, y, flip) {
let sx = (sprite_no % 8) *8;
let sy = Math.floor(sprite_no / 8)*8;
if (flip) {
context_bg.save();
context_bg.scale(-1,1);
context_bg.drawImage(spriteSheet, sx, sy, 8, 8, -x-8, y, 8, 8);
context_bg.restore();
} else {
context_bg.drawImage(spriteSheet, sx, sy, 8, 8, x, y, 8, 8);
}
}
function update() {
context_bg.clearRect(0, 0, canvas_bg.width, canvas_bg.height);
chara1.update();
chara1.draw();
chara2.update();
chara2.draw();
// enlarging the display
context.clearRect(0, 0, canvas.width, canvas.height);
context.drawImage(canvas_bg, 0, 0, canvas_bg.width, canvas_bg.height, 0, 0, canvas.width, canvas.height);
}
setInterval(update, 10);Preparing the Spritesheet
First, you need to prepare the base pixel art. You’ll need a graphics editor for creating pixel art, and I use the free software Firealpaca. I recommend it.
If you don’t want to make your own, you can use free pixel art available online or buy some assets. Just Google “pixel art character” and you’ll find plenty of resources.
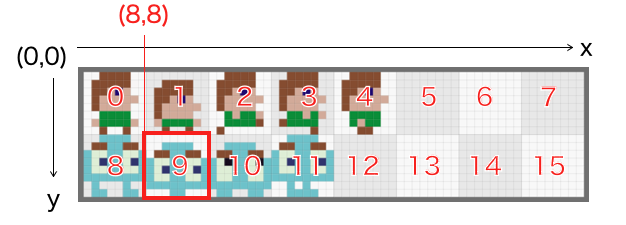
Here’s what the spritesheet.png used in this demo looks like (shown enlarged; the actual size is much smaller).

There are 8 columns and 2 rows of 8×8 pixel cells. Each 8×8 pixel image is called a sprite, and an image with multiple sprites lined up is called a spritesheet.
How you arrange the sprites on the spritesheet depends on how you want to manage them, so it’s up to you.
In this example, rows are divided by character type, but you can also cram as many sprites into one row as you like. The spritesheet has 8 columns of 8×8 pixel cells, but there’s no specific limit, so you could have 16 columns in a row, for example.
You might notice that although there are only images facing right, the demo also shows them facing left. I’ll explain this briefly later; it’s done by flipping the image during JavaScript rendering.
Managing Sprite Numbers and Drawing
When drawing sprites in JavaScript, it’s convenient to specify which cell on the spritesheet contains the image you want.
We assign numbers to the 8×8 pixel cells on the spritesheet. In this demo, they’re numbered like this.

Once the numbering is decided, we can determine how to cut out 8×8 pixel images from the spritesheet. Here’s the implementation.
function drawSprite(sprite_no, x, y, flip) {
    let sx = (sprite_no % 8) *8;
    let sy = Math.floor(sprite_no / 8)*8;
  ・・・
        context_bg.drawImage(spriteSheet, sx, sy, 8, 8, x, y, 8, 8);
  ・・・
}
The % operator returns the remainder of a division, and Math.floor() returns the integer part of a number. When used with division, it gives the quotient.
For example, for the 9th image, sx and sy are calculated as follows:
sx = (9 % 8) * 8 = 1 * 8 = 8
sy = Math.floor(9 / 8) * 8 = 1 * 8 = 8
The 9th image is cut out from the coordinates (8, 8). The width and height are fixed at 8.
Cutting out the image and drawing it on the canvas is done using the drawImage() function. Here are the specifications.
context.drawImage(
    image,      // Image object
    sx,         // X coordinate to crop within the image
    sy,         // Y coordinate to crop within the image
    sWidth,     // Width to crop
    sHeight,    // Height to crop
    tx,         // X coordinate on the Canvas
    ty,         // Y coordinate on the Canvas
    tWidth,     // Width to draw
    tHeight     // Height to draw
);
Drawing Flipped Sprites
The spritesheet only contains right-facing images, and we didn’t prepare left-facing ones. When the character faces left, we flip the cut-out image before drawing it.
The flip processing is implemented in the part of the drawSprite() function surrounded by if (flip) { ... }. This uses JavaScript functionality, but I won’t go into detail here. For now, just think of it as something that does this. If you want to know more, you can search online.
function drawSprite(sprite_no, x, y, flip) {
    let sx = (sprite_no % 8) *8;
    let sy = Math.floor(sprite_no / 8)*8;
    if (flip) {
        context_bg.save();
        context_bg.scale(-1,1);
        context_bg.drawImage(spriteSheet, sx, sy, 8, 8, -x-8, y, 8, 8);
        context_bg.restore();
    } else {
        context_bg.drawImage(spriteSheet, sx, sy, 8, 8, x, y, 8, 8);
    }
}
Of course, you can also achieve this by preparing left-facing images on the spritesheet.
Implementing Animation
Now that we can cut out arbitrary sprites from the spritesheet and draw them, we just need to switch between them in order to create an animation.
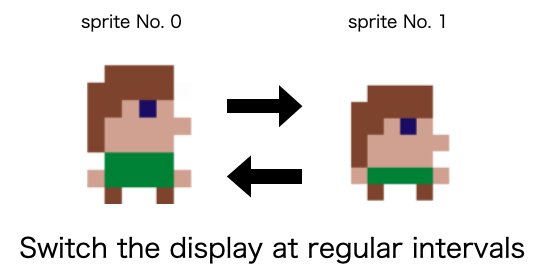
How do we switch the display at regular intervals? The base is JavaScript’s setInterval() function.
setInterval(update, 10);This makes the update function get called repeatedly every 10 milliseconds. (If you change the second argument to 20, it’ll be every 20 milliseconds.)
The update() function calls the anime_update() method of the Chara class in the following sequence:
update()
    → chara1.update()
           → chara1.anime_update()
anime_update() is also called every 10 milliseconds. This function switches the sprite number to be drawn in order.
    anime_update() {
        let frames = this.anime_table.frames;
        let frame_interval = this.anime_table.frame_interval;

        if (this.anime_count >= frame_interval) {
            this.anime_index = (this.anime_index+1) % frames.length;
            this.anime_count = 0;
        }
        this.sprite = frames[this.anime_index];
        this.anime_count++;
    }
Here’s how the implementation looks.
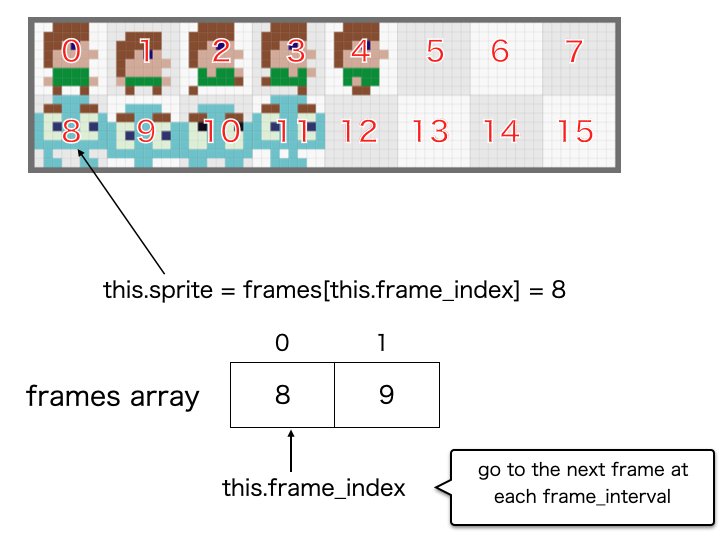
Where are frames array and frame_interval defined?
They are given when creating an instance of Chara.
let chara1 = new Chara(20, 10, {frames: [0,1,2,3,4], frame_interval: 60});
let chara2 = new Chara(50, 20, {frames: [8,9,10,11], frame_interval: 50});
The 60 here means 60 cycles of 10 milliseconds. So, it changes every 600 milliseconds. In this demo, chara1 changes its sprite every 60 cycles (600 milliseconds), and chara2 every 50 cycles.
If you’re interested, try fiddling with these numbers and see how the animation changes.
Using Two Canvases and Enlarging the Display
The actual defined pixel art is 8×8 pixels, and if displayed at that size, it would just be tiny dots, making it hard to understand what’s going on. In this demo, the display is enlarged 8 times in both width and height.
To achieve this, we define two canvases:
canvas_bg: Used to draw the 8×8 pixel images at their original size. It’s hidden in the HTML.gameCanvas: Defines an area 8 times the size ofcanvas_bg, and is displayed in the HTML.
Normally, drawing is done on canvas_bg, and at the end, canvas_bg is enlarged and copied to gameCanvas. Here’s the code.
    // enlarging the display
    context.clearRect(0, 0, canvas.width, canvas.height);
    context.drawImage(canvas_bg, 0, 0, canvas_bg.width, canvas_bg.height, 0, 0, canvas.width, canvas.height)
What’s Next After Animation
So, we’ve seen how to animate a simple pixel art character. Wasn’t it simpler than you thought?
If the character’s size is fixed (8×8 pixels, 16×16 pixels, etc.), you can manage it with a spritesheet, making animation relatively easy.
For making small games with pixel art, this should be enough.
After creating animation, if you can link it to the character’s state and movements in different directions, you can make a more expressive game. Next time, we’ll implement that.



コメント