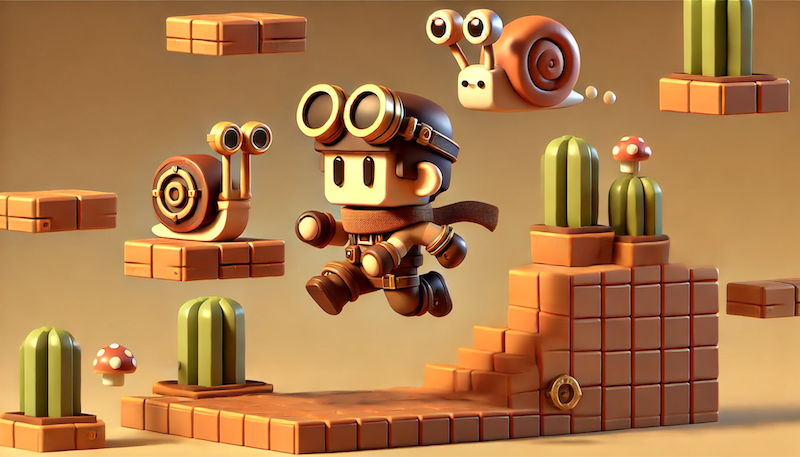
Let’s create a game using HTML and JavaScript, without relying on game engines or libraries.
This guild is for people who:
Want to make a game but don’t know where to start.
Want to create a simple game without using complex engine like Unity or Unreal Engine.
It’s aimed at those who with some programming knowledge.
What we build?
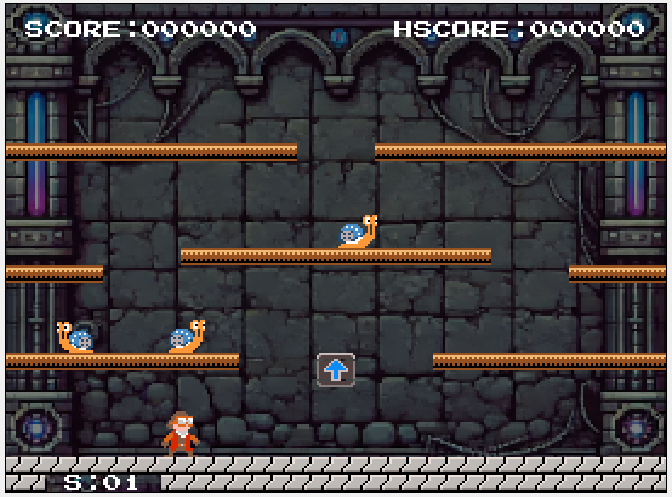
You can check out the completed game and give it a try here:
Related Articles to Check Out First
Source Code
Here are the structure of all files. The bold files name are files added since the previous version.
.
├── Block.js
├── Chara.js
├── GObject.js
├── GamePoint.js
├── PBlock.js
├── Pipe.js
├── Snail.js
├── SpriteSheet.js
├── UserInput.js
├── World.js
├── assets
│   ├── background.png
│   ├── chara_spritesheet.png
│   ├── gamefont.png
│   ├── pow_spritesheet.png
│   ├── smallnumfont.png
│   ├── snail_spritesheet.png
│   ├── stages.json
│   ├── style.css
│   ├── tilesheet.png
│   └── title.png
├── index.html
└── index.js
Features Explained in This Article
In the previous article, we had already introduced the enemy character (Snail), so all the basic game mechanics were in place. Now, we’ll add the following game components:
- A score display with pixel-style fonts.
- Score pop-ups when enemies are defeated.
- Player death and game-over handling.
- Stage transitions.
- Smooth screen transitions.
The game might be small, but it’s complete!
Displaying Pixel Fonts
The resolution for rendering in this game is quite small. It’s built on an 8×8 pixel grid and drawn within a 36×32 grid world. From this, only a portion of 34×28 tiles is clipped and scaled up for display.
When displaying this small resolution, it’s enlarged to fill the browser’s entire display area.
For text in the game, you could use proportional fonts supported by JavaScript, but sticking to the 8×8 pixel base helps maintain the pixel art aesthetic.
The fonts are prepared as PNG data and used as a sprite sheet, with each character rendered as either 8×8 or 4×6 sprites.
8×8 pixels character fonts
This image appears to have a black background, but it is actually transparent.

4×6 pixels character fonts
This image appears to have a black background, but it is actually transparent.

Here is the source code of displaying text.
const fontsheet = new SpriteSheet(8,8,"./assets/gamefont.png");
const fontchars = "0123456789ABCDEFGHIJKLMNOPQRSTUVWXYZ:-=";

function charIndex(c) {
    let idx = fontchars.indexOf(c);
    return idx >= 0? idx : fontchars.lengh;
}

function putchar(c,x,y) {
    drawSprite(fontsheet, charIndex(c), x, y);
}

export function print(str ,x ,y) {
   for (let i = 0; i < str.length; i++) {
       putchar(str[i], x + 8*i, y);
   }
}
・・・・
const numfonts = new SpriteSheet(4,6,"./assets/smallnumfont.png");

export function print_small_num(str, x, y) {
   for (let i = 0; i < str.length; i++) {
       numfonts.drawSprite(context_bg, charIndex(str[i]), x + 4*i, y);
   }
}
For example, when to display game score, use print() function as follows:

print(`SCORE:${padNumber(world.score, 6)}`, 2*8, 3*8);Points are also displayed when you knock down a Snail.(”800″ or “1000”)
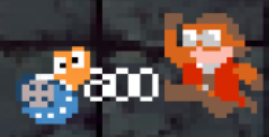
This uses the 4×6 pixel font. Since this display disappears after a certain period, it is managed by the GamePoint class. The display is handled using the print_small_num() function.
print_small_num(`${this.points}`, this.x, this.y);Player and Enemy Interaction (Game Over Process)
When the player touches a Snail that has been flipped over, the player knocks it down. However, in all other cases, the player dies.
(1) If all Snails are in an attackable state, they will target the player.
For details on how the player attacks a Snail, refer to the previous article. As for Snails attacking the player, all Snails are checked one by one.
・・・
        for (let e of this.enemy_list) {
            e.affectForce(0, GRAVITY);
            e.update();
            if (e.offensive()) {
                this.player.attack(e)
            }
offensive() in Snail.js is the function to judge if attacking is possible.
    offensive() {
        return this.state == State.STOP || this.state == State.MOVE_LEFT || this.state == State.MOVE_RIGHT;
    }
(2) Player is attacked judge whether it actually hits him
If it actually hits him, then go to the state of DEAD.
    attack(src) {
        if (this.state == State.DEAD || this.state == State.FALL_END)
            return;
        if (this.hit(src)) {
            this.vx = 0;
            this.vy = 0;
            this.change_state(State.DEAD);
        }
    }
The state after the state of DEAD is as following:
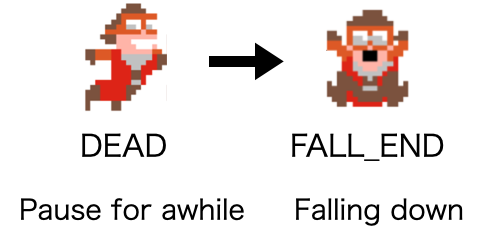
(3) Transitioning Game States When the Player Is Dead
Meanwhile, the World class checks during each update cycle whether the player has died. The is_deading() method in the Player class determines if the player is in the DEAD or FALL_END state.
The World class manages the game states, and if the player is dead, it transitions to the PLAYER_FALL state to freeze the entire screen.
    update_game_run() {
    ・・・
        if (this.player.is_deading()) {
            this.state = State.PLAYER_FALL;
            return;
        }
・・・
Management of Game State
This game has three main states.
| TITLE | The title screen. Press the ‘s’ key to start the game. |
| GAME | The gameplay state. |
| GAME_OVER | The state when the player dies. After a short while, it returns to the title screen. |
The gameplay state is further divided into more detailed sub-states.
| START_STAGE | Displays a message indicating the start of a stage. |
| GAME_RUN | The main gameplay state |
| STAGE_CLEAR | The state when all enemy characters have been defeated. Prepares for the next stage and transitions back to START_STAGE. |
| PLAYER_FALL | The state when the player touches an enemy character, dies, and falls. |
| GAME_OVER | The state when the player falls off the screen. |
The state transitions can be represented as shown in the diagram below.
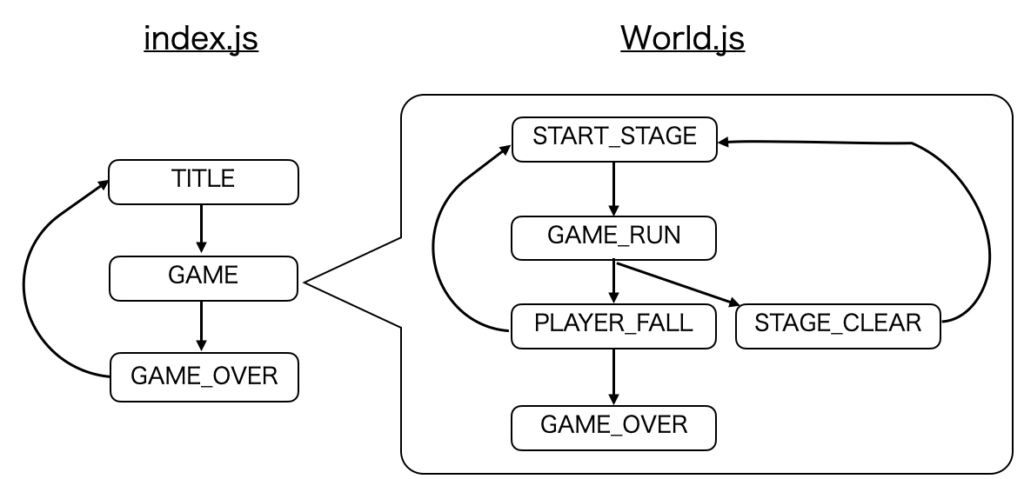
The main states are managed in index.js, while the more detailed states during the GAME phase are handled in World.js. The implementation checks the states within the update() function using a switch statement to process them accordingly.
・・・
function update() {
    switch(state) {
    case State.TITLE:
      ・・・
        break;
    case State.GAME:
      ・・・
        break;
    case State.GAME_OVER:
      ・・・
        break;
    }
    requestAnimationFrame(update);
}
・・・
update() {
switch(this.state) {
case State.START_STAGE:
・・・
break;
case State.GAME_RUN:
・・・
break;
case State.STAGE_CLEAR:
・・・
break;
case State.PLAYER_FALL:
・・・
break;
case State.GAME_OVER:
// do nothing
break;
}
}Wrapping up
Over the course of four articles, we’ve explained how to create a “Mario Bros”-style 2D jump action game. The game includes all the essential mechanics of Mario, along with features like state transitions and score displays, resulting in a small but complete game.
From here, you can make the game more engaging by adding new types of enemies, introducing mechanics like icy floors, or implementing other features to keep the stages interesting as players progress. With proper animations, adding moving platforms and similar elements can also be relatively simple.
The source code is fully open-source, so feel free to tweak and modify it as you like. However, while the source code is licensed under the MIT License, the image files in the assets/ directory are not. Please limit their use to personal enjoyment only.
Enjoy it!
